Gitlab CI/CD Pipelines
Pipelines are the top-level component of continuous integration, delivery, and deployment.
Pipelines consist of:
- Jobs, which define what to do. For example, jobs that compile or test code.
- Stages, which define when to run the jobs. For example, stages that run tests after stages that compile the code.
- Jobs are executed by runners. Multiple jobs in the same stage are executed in parallel, if there are enough concurrent runners.
- If all jobs in a stage succeed, the pipeline moves on to the next stage.
- If any job in a stage fails, the next stage is not (usually) executed and the pipeline ends early.
Note: In general, pipelines are executed automatically and require no intervention once created. However, there are also times when you can manually interact with a pipeline.
Create and run a pipeline
Prerequisites
- A project in GitLab that you would like to use CI/CD for and Maintainer or Owner role.

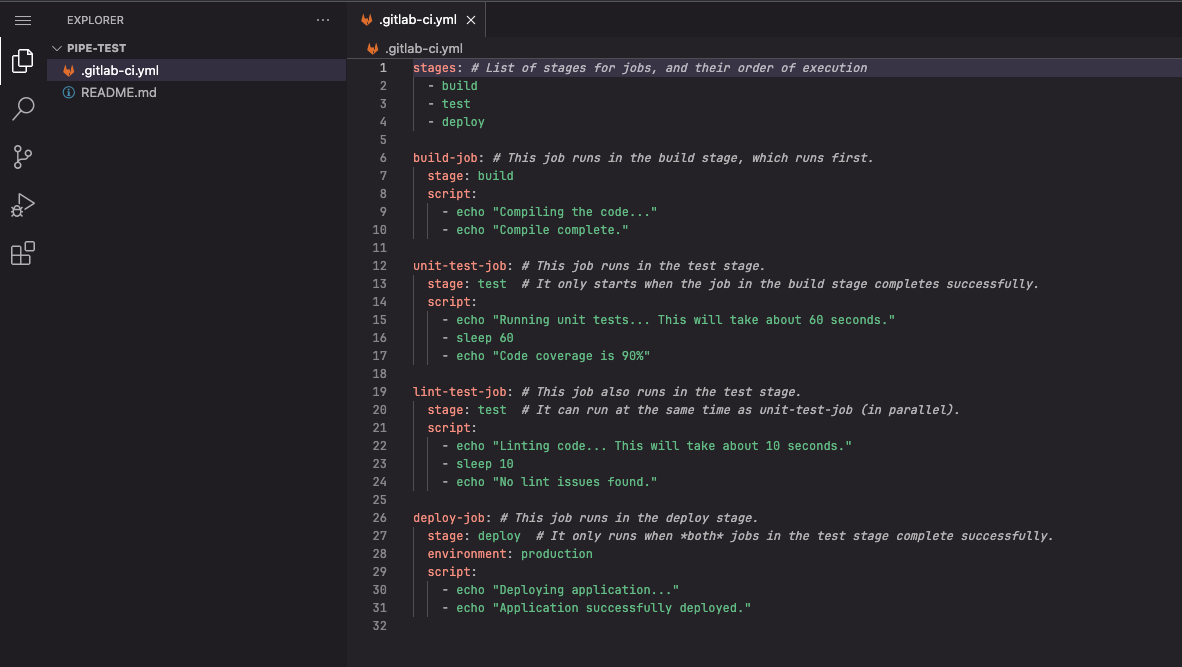
Create a .gitlab-ci.yml file
Now create a .gitlab-ci.yml file over root path of your code. It is a YAML file where you specify the instructions for GitLab CI/CD pipeli to execute.
In this file, you define:
- The structure and order of jobs that the runner should execute.
- The decisions the runner should make when specific conditions are encountered.
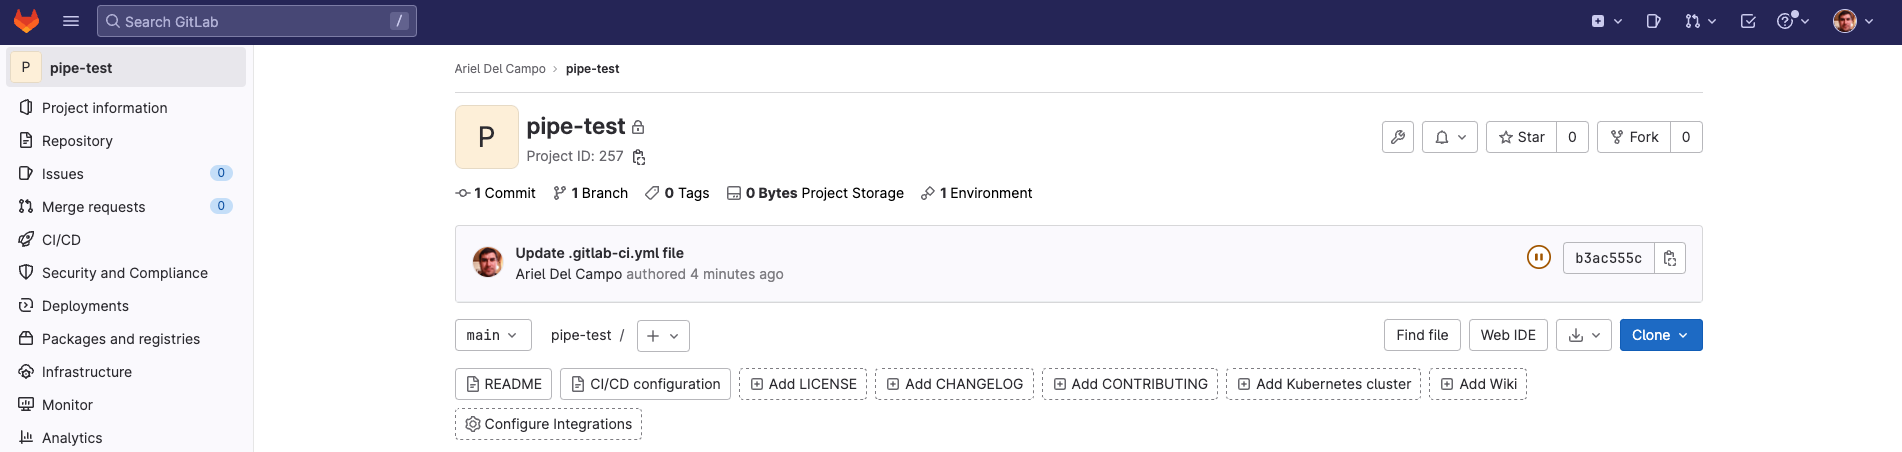
- After file is added to the project the runner will automatically run the pipeline.
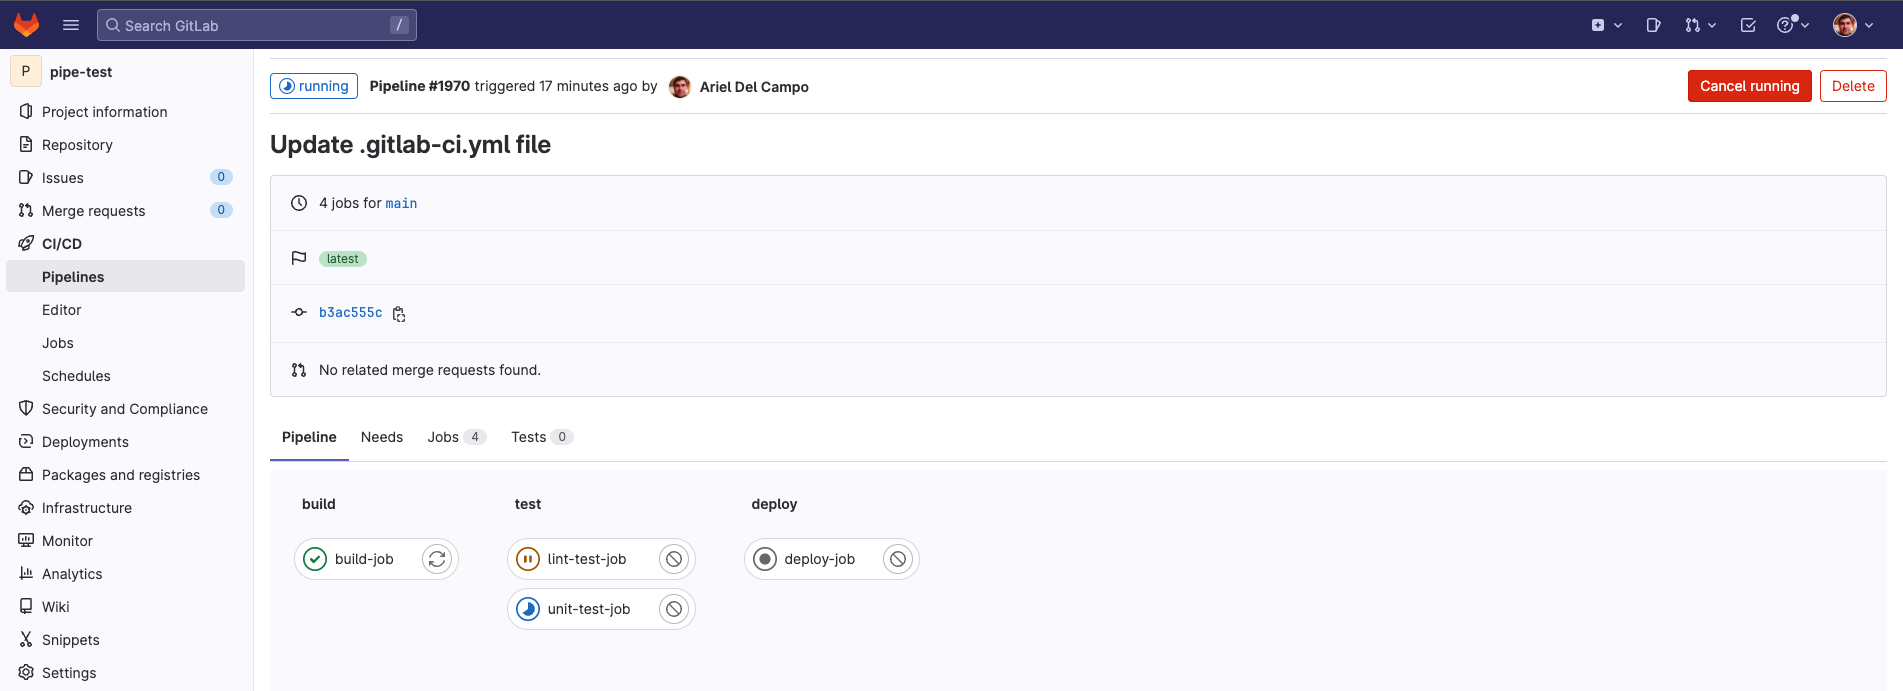
View the status of your pipeline and jobs
- Go to your project CI/CD > Pipelines. A pipeline with three stages should be displayed:

- View a visual representation of your pipeline by selecting the pipeline ID:
- View details of a job by selecting the job name. For example,
build-job
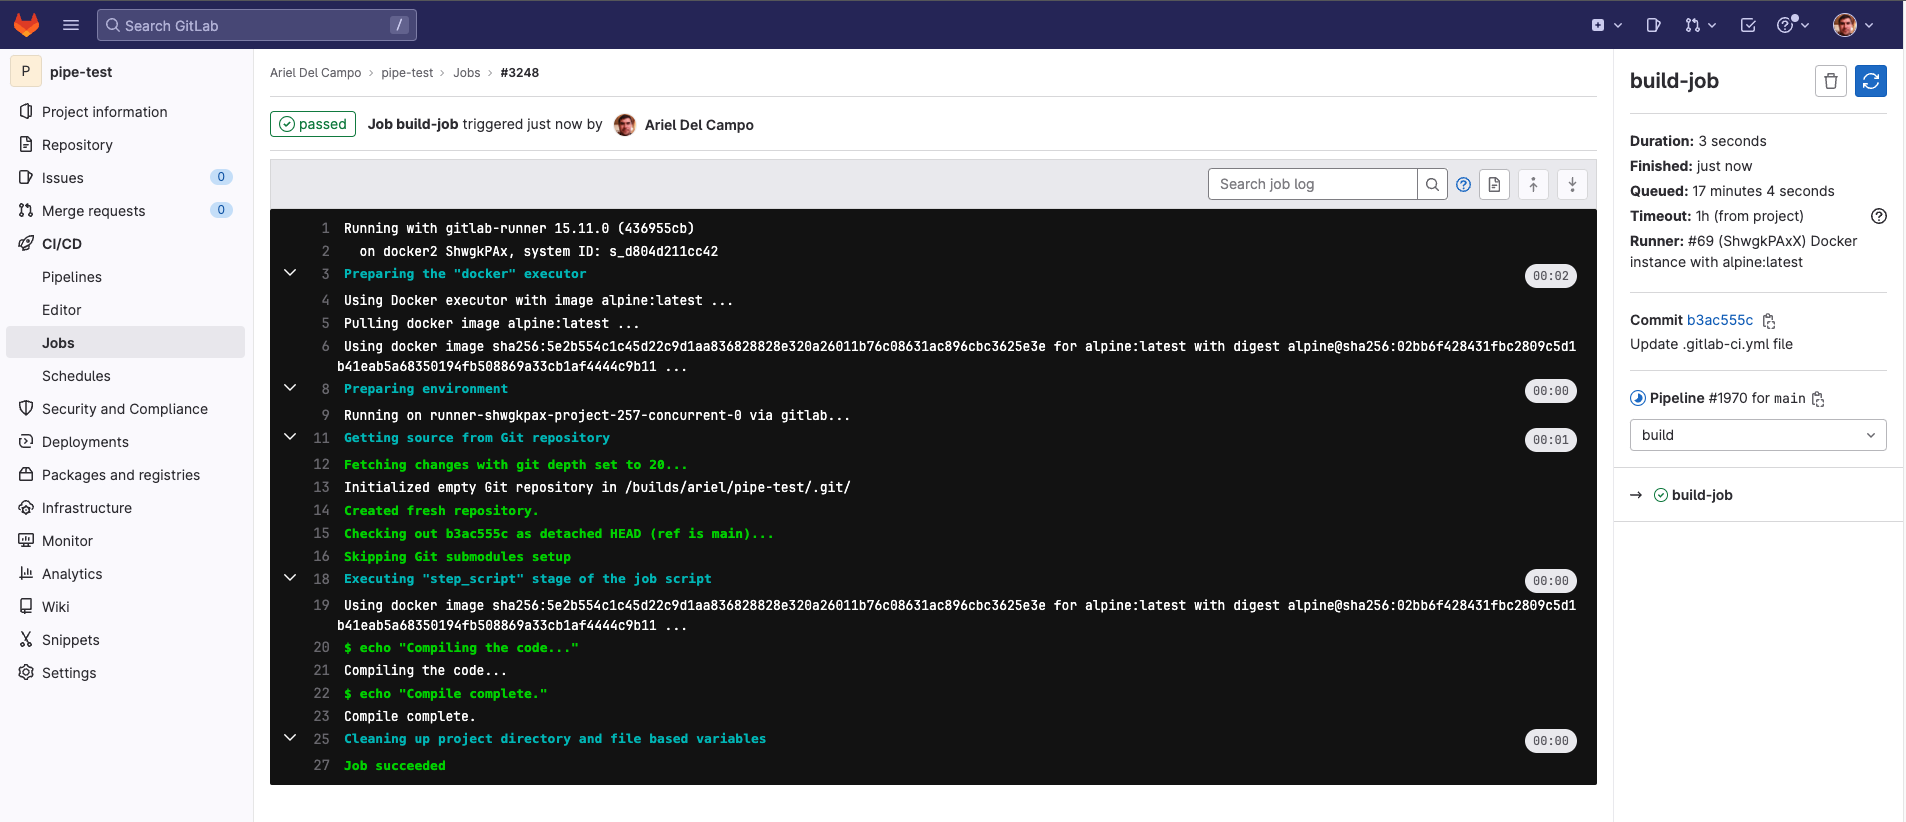
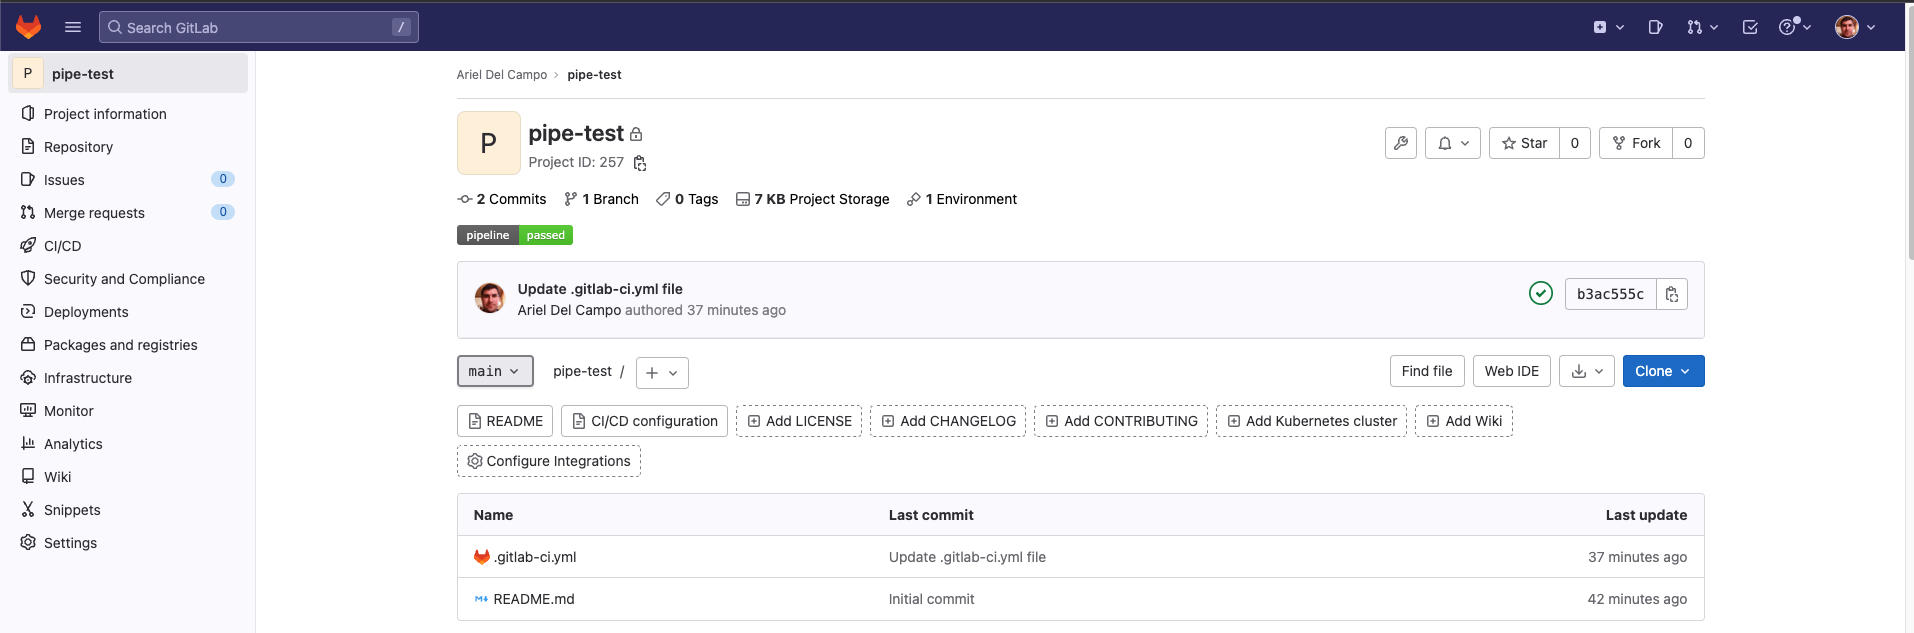
Congratulations! You have successfully created a CI/CD pipeline in GitLab.
Now you can get started customizing your .gitlab-ci.yml and defining more advanced jobs.
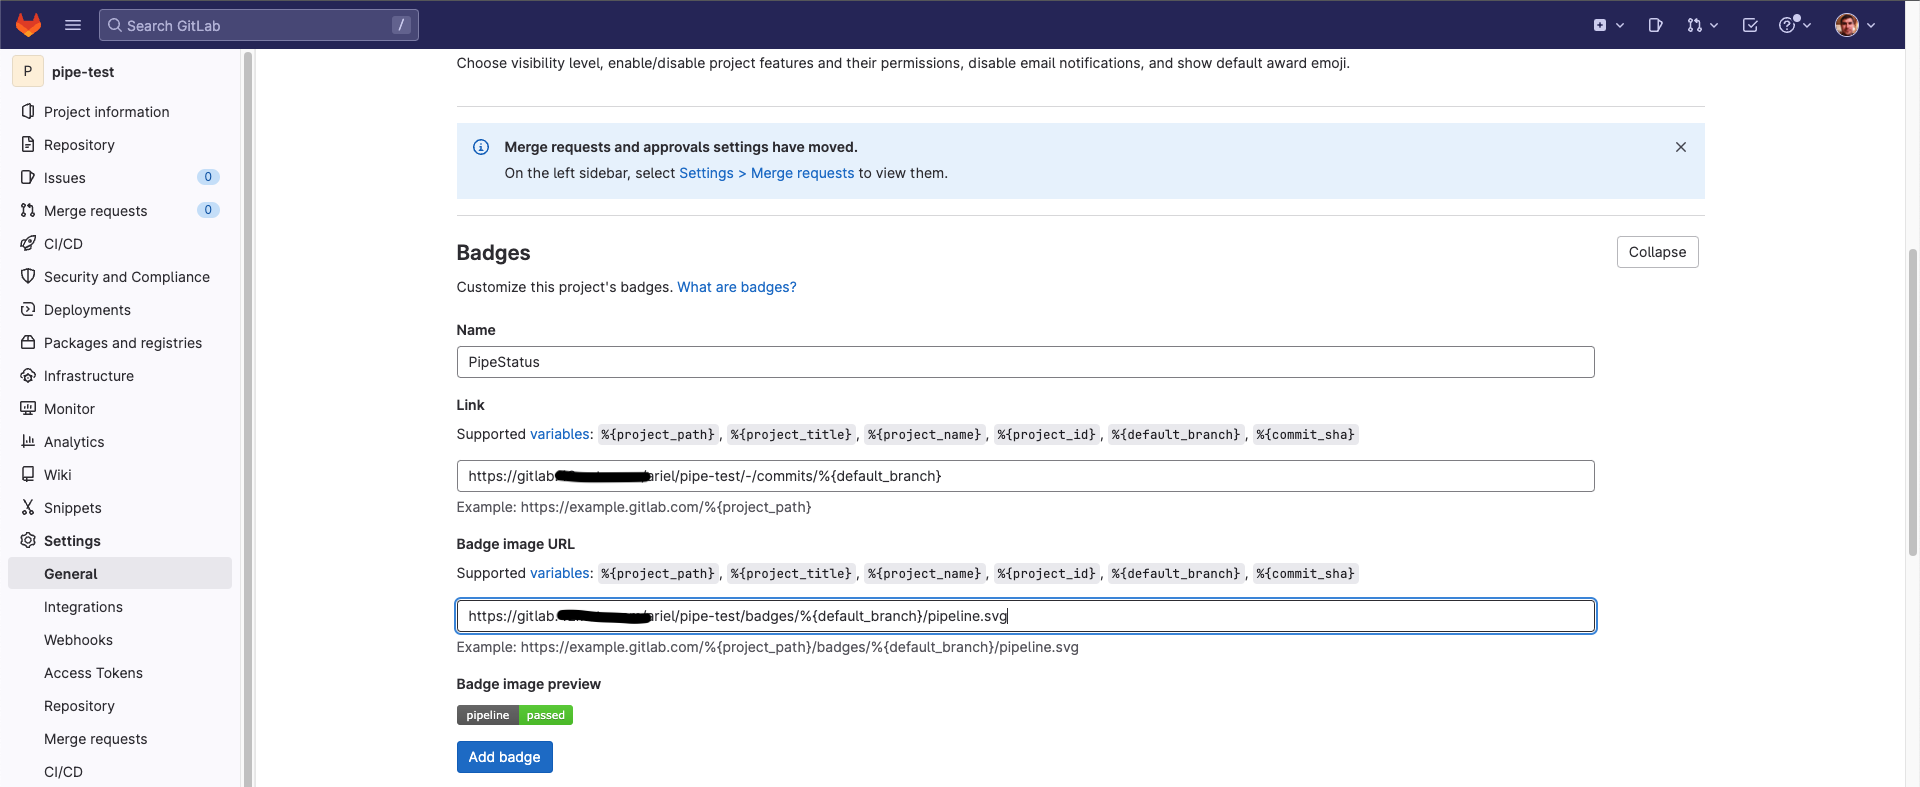
Bonus – Add badge to reflect pipeline status on project
- On your project left sidebar, select Settings > General.
- Expand Badges.
- Under Name, enter PipeStatus.
- Under Link, enter the following URL:
https://gitlab.com/%{project_path}/-/commits/%{default_branch} - Under Badge image URL, enter the following URL:
https://gitlab.com/%{project_path}/badges/%{default_branch}/pipeline.svg - Select Add badge.