

Customizing Laravel Nova: Adding Our Custom Modules
Introduction
Laravel Nova is described by their developers as “a beautifully-designed administration panel for Laravel. Carefully crafted by the creators of Laravel, Nova is designed to make you the most productive developer in the galaxy”. I cannot argue with that description, this is an amazing tool if you have a simple admin panel and you will use it for a simple site. Now, if you have a big project with big expectations, you will have to do some “dirty work” to achieve your goals.
But don’t worry about that, we’ll learn step by step how to get the best out of this precious administration panel without losing productivity. So, put your goggles on, and let’s go diving into the depths of Laravel Nova!
Adding modules the way Nova wants
So, when you start learning about Nova, you’ll find that Nova has different views:
- Dashboard: you can create a dashboard to show information like statistics, reports, statuses, etc.
- Index: when you create a resource (corresponding to an Eloquent model on your application), you will be able to see an Index view, that should display a table containing all the elements you’ll have on your database for that model.
- Detail: if you click on a row of the Index view, Nova will take you to the detailed view of that resource, where you can find some information you decided to omit from the Index view.
- Create/Update: these views are similar and will display a form that you’ll use to create a new instance of your resource or to modify an existing one.
By default, Nova gives you some tools to add modules to your views: a card will be shown on a Dashboard or an Index view, a field will be shown on the Detail or the Create/Update views, a resource tool will be shown primarily on the Detail view, a custom tool will create a whole new view and you’ll be able to do whatever you want with it (writing your own Vue code).
Adding modules the way we want
Now, we have a lot of ways provided by the developers of Laravel Nova, and they help us a lot in the initial phases of our project. But, in some cases, you will need to fit some design requirements and there you’ll need to make some changes to the components generated by Nova (and without having issues when trying to update Nova to a newer version). So, let’s learn how to customize Nova’s heart to meet our needs.
Step 1: Create a custom tool
The first step is to create a custom tool, if you’ve been working on Nova before probably you know how to do this, if that’s not the case you just need to run the following command:
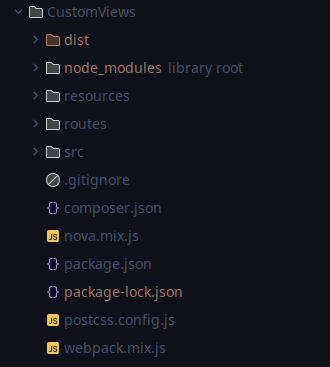
php artisan nova:tool <vendor-name>/<tool-name>In my case, I’ve created a tool called custom-views, and Nova created a nova-components/CustomViews directory with the following files:
Step 2: Creating our own components
If you go to Nova on your web browser, then you go to the console and write Nova.pages, the console will return you an object with all the pages you can modify with this method (note that you should also be able to modify some error pages like the 404 page).
Let’s modify the “Nova.Detail” page. For that, we’ll go to the directory created by Nova and create a new Vue component (resources/js/pages/Detail.vue).
On our component, we’ll add the following code (you should modify it depending on the page you’re customizing):
// nova-components/CustomViews/resources/js/pages/Detail.vue

<template>
    <div>
        <b>Hi! I'm modifying Nova Detail view!</b>
        <OriginalDetailPage v-bind="$props" />
    </div>
</template>

<script>
export default {
    components: {
        OriginalDetailPage: Nova.pages["Original.Nova.Detail"],
    },
    extends: Nova.pages["Original.Nova.Detail"],
    inheritAttrs: false,
}
</script>
On the <OriginalDetailPage> tag, we’ll load the original page that was previously created by Nova, you can create your own components to replace it too, but I’m leaving it as it is for the moment.
Step 3: Overriding the default page
At this moment, we won’t be able to see anything different, that’s because we need to override the page defined by default on inertia.
To do that, let’s go to the resources/js/tool.js file, and modify it like this:
// nova-components/CustomViews/resources/js/tool.js

Nova.booting((app, store) => {
    Nova.inertia("Original.Nova.Detail", Nova.pages["Nova.Detail"]);

    Nova.inertia("Nova.Detail", require("./pages/Detail").default);
})
After that, let’s just rebuild the tool to see if the changes were correctly applied with
npm run build-<tool-name>And, if you’ve done every step correctly, you’ll be able to see something like this:

As you can see, we’ve added custom code on the default view of the Nova admin panel.
Of course, this is an easy code example, you can modify the Vue component the way you want to be able to add your own information, components, or what you want to the original Nova components.
Excelente post Martin. Creo que pocos artículos en la web cubren una profundidad y nivel avanzado como la de tu artículo.
Slds desde Chile.